Showing posts with label christmas. Show all posts

Friday, January 9, 2015

RECIPE: Chocolate Covered Pretzels

These versatile treats make a great snack for any occasion or holiday! 

Example pretzels provided by Brittney
By simply using different colored chocolate and sprinkles, you can create a themed treat for any holiday or occasion- White chocolate dyed orange and purple with yellow and green sprinkles for Halloween, white chocolate with red and green sprinkles for Christmas... The possibilities are endless. They're also a hit with the kids!

INGREDIENTS:

1 bag White Chocolate Chips
1 bag Pretzel Twists
Garnish Candies: Colored Sugar, Sprinkles etc.
Food Coloring (if desired)
Wax Paper

Lay sheets of wax paper on your work surface. Melt chocolate in a large glass mixing bowl in the microwave- Heat for 2 minutes, stir, heat and additional 2 minutes. Chocolate should be easy to stir and all chips completely melted. Add food coloring at this time, mix thoroughly.

Use tongs to dip pretzels into chocolate, lightly tapping the tongs on the edge of the bowl to remove excess chocolate. Lay pretzels on wax paper and lightly sprinkle with garnish candies.

Let pretzels completely cool before storing in an airtight container. 1 bag of chocolates makes appx. 4 doz pretzels.

Thursday, January 8, 2015

RECIPE: Shrimp Cocktail Cheese Ball

This tangy, spicy cream cheese based cheese ball is simple to prepare, and can be made a day ahead. 


I made this cheese ball as a dish to pass for our 4H Holiday Party tonight, which has been cancelled due to arctic wind chills and impending snow storm. While we're pretty bummed our first meeting was cancelled, we get to enjoy this tasty snack ourselves by the fire tonight!

INGREDIENTS

2 8 oz pkg Cream Cheese, softened
2 Tbsp. Mayonnaise
1/2 c. Cocktail Sauce, divided
2 Tbsp. Franks Red Hot
1/3 c. Shrimp, minced
2 green onion, minced

Blend cream cheese, mayo, 1/4 c cocktail sauce and Red Hot. thoroughly. Add shrimp and onions, mix thoroughly. Form mixture into a ball or desired shape and chill for at least 2 hours before serving. Pour remaining 1/4 c. cocktail sauce over cheese ball before serving. Garnish with lettuce leaves and a whole shrimp if desired. Serve with your favorite crackers. 


Thursday, December 18, 2014

RECIPE: Christmas Candy

As promised, here are the 2 recipes I used for our Christmas Candy this year! Extremely simple, these recipes are made using only a microwave!


We kicked off the Christmas cooking last night with Peppermint Bark and Peanut Butter Fudge. These were both new recipes for us, and we're very pleased with the results. To be honest, I was a little skeptical in using the microwave for the fudge, but it is delicious!

SHOPPING LIST:

1 Bag White Chocolate Chip Morsels 
Peppermint Extract
 6 Candy Canes
1 Jar Smooth Peanut Butter
Unsalted Butter
1 lb Bag Powdered Sugar
Vanilla Extract
Aluminum Foil
Wax Paper

RECIPES (Click Link):


The toughest part of the entire candy making evening was breaking up the Peppermint Bark after it had cooled! You will also want to pat the candy cane chunks down into the chocolate a bit to assure they adhere, a lot tends to fall off while breaking it up. We did not use the red food coloring in ours.

We're taking tins like the one above to our family get-togethers, as well as giving one as a neighbor gift. We got the tins and tissue paper at Dollar Tree. One batch of each recipe fills 2 5x7" tins.

Tonight, cookies!


Tuesday, December 16, 2014

ONE Week Til Christmas Eve!

Time sure flies! Just one week until Christmas Eve!

Homemade dough ornament by Britt
It's going to be an extremely busy week here at the farm. Our festivities actually begin Saturday, with a dinner and gift opening at my parent's place, with our big family Christmas dinner at Grandma's on Christmas Eve. It'll be Grandma's 91st Christmas this year! 

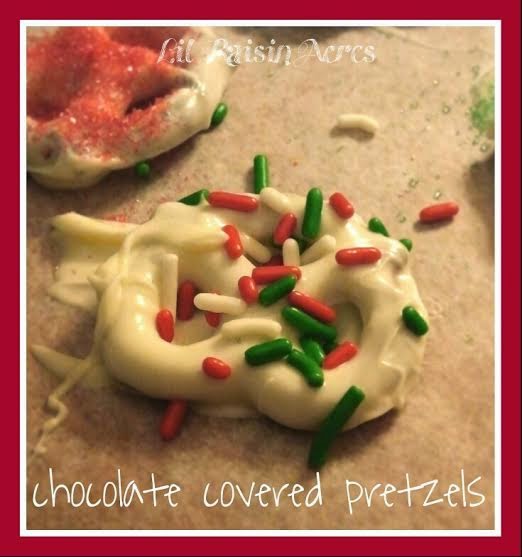
With family dinners come potluck dishes. This week, we'll be baking Sugar Cookies and making Peanut Butter Fudge. We'll also be giving Peppermint Bark a go this year. Of course, it wouldn't be a holiday without Deviled Eggs, I'll be whipping up a few dozen or so of those as well.  Another quick and easy potluck offering idea- home canned pickles. We plan on taking a couple jars along with some venison jerky, too! 

Seems like a lot of food, but when you have 5 sets of aunts/uncles, 16 cousins plus spouses and their children, your parents, a brother and his wife, and a neice... That's a lot of hungry people! LOL I always take my seat at the table bearing the appetizers. My uncle brings a shrimp platter with homemade spicy cocktail sauce, and there's always a vegetable tray, along with my eggs. That's a meal in and of itself for me!

Along with all the baking/cooking generally comes present wrapping, but with Britt's help, I can happily say it's all already out of the way! I absolutely love online holiday shopping. It is such a time saver, and when you live in a rural area, it can certainly be money saving as well considering fuel. We did take a trip to Cabela's though, and I'm glad we did. They had a lot of cute novelty gifts we picked up, and I found myself an inexpensive multi-tool to keep in my barn coat pocket! I can't tell you how many times I've gotten out there and no knife to cut the feed bags open with, or a screwdriver to tighten a loose screw on the coop latch!

Speaking of busy, it's time to give Deenis and Baa their afternoon snack! Keep an eye out for posts containing the recipes for Peanut Butter Fudge and Peppermint Bark a little later in the week! Til then...

Friday, November 28, 2014

DIY: Dough Christmas Ornaments

Decorated by Brittney

Hope everyone had a wonderful Thanksgiving Dinner with their family and friends yesterday! I promised I'd post the dough ornament recipe I tried if they turned out alright. Here it is! 3 inexpensive ingredients and a little paint later, our tree will have an entirely new theme this year!

INGREDIENTS:

4 c. All Purpose Flour
1 c. Salt
1 1/2 c. Warm Water

PREPARATION:

Preheat oven to 300 degrees. Mix flour and salt together thoroughly in a mixing bowl. Slowly add water a bit at a time, mixing thoroughly as you go. Knead dough until it is of smooth consistency. Roll dough out on a floured surface, cut into desired shapes using cookie cutters or a sharp knife. Use a large diameter screw or nail to punch holes in the top of each ornament. Bake on cookie sheets for 60 minutes. Remove ornaments from sheets and place on cooling racks.

Once ornaments completely cool, use acrylic craft paints and glitter to decorate as desired. Seal with a coat of clear varnish. (Glue on embellishments like rhinestones and ribbons should be glued on after sealing.) Use green thread or wire ornament hangers to place them on your tree.